Pages

Saturday, November 16, 2013

My Final Project

Here is my last attempt at nalbinding for the project. I'm sorry it could not be ready for the presentation!


It's not perfect but I used the Russian join to add new pieces of yarn and it turned out a lot tidier than my hat.

Thursday, November 14, 2013

Evolution of my Nalbinding

From Left to Right: First attempts, to my present headband

A month ago when I first began nalbinding, I was quite simply terrible and It was not a positive start, granted if only because, I have little to no back round in needle or craft work. I am pleased, however, to say that I can now make proper pieces, by use of the Oslo stitch. I wanted to try and make a pair of gloves or mittens but unfortunately I didn't have enough time so I settled for a headband to decorate my teddy bear for the presentation.

It's difficult to see but this is the Coopergate/York stitch


 I had attempted to also work on the Coopergate or York stitch but found it difficult to practice both types enough to be good at both, in the limited time I had. Also I noticed that it was much easier to make mistakes in terms of dropping a stitch and having gaps in the piece with the Coopergate/York variation.Which is why as a beginner I decided to focus on the somewhat easier Oslo stitch.
My first successful try at joining pieces aka nalbinding in the round
I realized that I failed to mention my creation of wooden nalbinding needle after my initial attempts using a tapestry needle, so here's a quick summary.
Basically I wanted to see what I could use at home, or at least without having to buy new material and I got lucky because it seems I have a slight inclination towards chopstick collection...I have lots of different kinds. Now the ones I have are made of proper wood, not the recycled ones at most places that are disposable. I did try with a round brown one first... but it didn't really work because once I got the piece thin enough, I accidentally broke it, the wood was apparently more prone to breaking when thinned down.

The one I used the most was the 3rd from bottom (apologies, I couldn't get the image to rotate...)
Next I went with my white bamboo wood, these ones were already flattened into a rectangular shape so all I really had to do was make it shorter, a bit pointier at the tip and make the eye. Overall I like the shape, although I believe mine is a bit longer than it should be and I also prefer the use of this versus the tapestry needle and most likely over bone too, just for the way it feels when you use it.

I suppose over the course of this past month or so, I've actually grown quite fond of nalbinding, it's enjoyable once you begin to understand the movements and get good at the method, with enough practice of course. I will probably try and continue my practice, maybe even make those mittens before Christmas, fingers crossed!


Comparisons and Observations, as well as Materials Research

Comparison of Nalbinding to Knitting

Overall, I found knitting to be much faster than nalbinding. Completing a row of 10 knit stitches took about 20-30 seconds, while 10 Oslo stitches took around 2.5 minutes. Part of this difference in time could be attributed to my relative lack of experience in nalbinding as compared to knitting. However, I am also quite amateurish where knitting is concerned, and the difference in time/stitch also seemed noticeable when videos of people knitting and nalbinding were compared. Knitting also was more efficient in that you did not have to stop as often to add on more yarn.

Additionally, the use of two needles in knitting, instead of a needle and a thumb, made it significantly easier to keep the stitches uniform. This was one of my main struggles in nalbinding, as the wool would slip from wider to thinner portions of my thumb as I worked. Nalbinding also had to be worked in the round, where knitting can be worked into a square or in the round.

I did find that the product achieved through nalbinding was much denser than knitting, and so could potentially be warmer. However, this could also be attributed to the fact that I used only plied yarn for knitting, and used mostly non-plied yarn for nalbinding.


Knitting Swatch
Nalbinding Swatch

Comparison of Yarn Types (Plied vs. Non-Plied)

Although I used mainly non-plied yarn in my nalbinding, I did make a few attempts using plied yarn. I found the plied to be easier to work with, as the stitches were more spaced out, and 'visible', but I preferred the results of the projects made with the non-plied wool. The final product made with non-plied had less gaps, and was much thicker than the plied work. However, the non-plied wool had a tendency to 'stick' to itself, and was far harder to untangle. It was also weaker than the plied, as I didn't need scissors to break off strands, it could just be pulled and snapped with the tension.

Non-Plied Cuff
Plied Cuff

Comparison of Needle Types

 I also made one of the chopstick needles, and tried it out on a row of Oslo stitch. I found it to be harder to use then the shorter, metal needle, mostly because I found the size was less 'clumsy' to maneuver. I also found that the metal needle slid much better, the wood had a tendency to catch as it was being pulled through, particularly when using the non-plied wool. Having said this, I might find a needle made of bone or something of the sort preferable to wooden needles, or perhaps a shorter wooden needle.

Materials Used

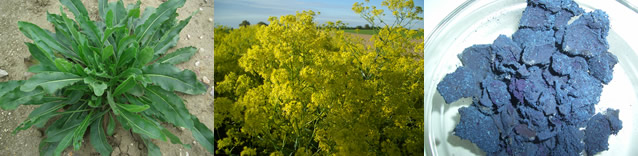
Although wool seems to be quite prominent as a material used, there has also been discussion regarding the use of plant based fibres in Viking textile production (Jorgenson, 1990; Skoglund, 2013). Jorgenson speaks mostly about pre-Viking age Northern Europe, focusing primarily on the Stone Age. Although this is quite long before the time period in question (the Viking Age), it is relavant in that it is noted that most textiles from this time period seem to be made of vegetable fibre (such as flax and willow). This indicates that these are materials which would have been readily available in the region, seeing as it would be some time before the arrival of the domestic sheep in Northern Europe (Jorgenson, 1990).

By the time the Viking Age came about, domesticated sheep would have become much more widespread, and it seems likely that their wool would have been adopted into use by textile producers. However, the possibility that vegetable fibres continued to be used throughout textile production remains, and is supported by Skoglund et al. (2013). He argues that hemp and flax continued to be used, alongside wool, in the production of both coarse (sails, etc) and fine (clothing, etc.) textiles. In his study, ten samples of locally produced textiles dated to the Viking Age were tested, with four being found to contain hemp mixed in with the wool fibre (Skoglund et. al, 2013). This, he feels, is evidence which suggests that plant material continued to be used in textile manufacture, despite the adoption of wool.

Sources

Jorgenson, L.B., (1990). Stone-Age textiles in North Europe. Textiles in Northern Archaeology, 1-10.

Skoglund, G., Nockert, M., & Holst, B., (2013). Viking and early middle ages northern scandinavian textiles proven to be made with hemp. Scientific Reports, 3, 2686.

Wednesday, November 13, 2013

Dyestuffs and Mordants

When I walk into Beehive Woolshop, my favourite yarn store, the first thing I see is colour. The shop is packed with yarns of any and every shade, and the best part about selecting the perfect yarn for a project is choosing the colour palette. Now, the majority of these yarns are dyed through chemical processes; very few are hand-dyed using natural colourants. During the Viking Age, however, and for a great amount of time prior and after this period, yarns were dyed by hand using natural dyestuffs obtained either through trade or through local collection. The majority of textile fragments preserved in the archaeological record are stained muddy brownish colours from hundreds of years of contact with the earth, but many of these fragments were originally vibrant reds, blues, greens, yellows, and purples. Researchers can study the original colour of these samples using a variety of techniques, such as different methods of spectrochemical analysis.  In this blog post, I want to provide an overview of the methodology of dyeing wool, which was the most common material used in nalbinding, and discuss the materials that would be needed to achieve brilliant, rich colours through natural means that were present during the Viking Age.

An example of the colour selection available to us modern-day knitters
Image: http://media-cache-ec0.pinimg.com/236x/a4/44/1a/a4441a4193662c2572c0969aee56c5b2.jpg

Dyestuffs:
Throughout the Viking world, wool was dyed using primarily plant-based colourants, although other mineral and insect sources have been discovered as well. The process of obtaining dyes through these plants depended on the substance being used, whether it be roots, barks, stocks or leaves, but generally, the plant material was powdered or soaked in almost-boiling water and applied to the fleece, yarn or finished textile (dyes could be added at several different points during textile production). Some vegetative sources could have been hand-picked close to home; depending on their geographical location, individuals would have access to certain native plants that could yield colourants through proper treatment. Other dyes, particularly those of higher quality and value, would be obtained through trade networks that spanned across Europe during the Viking Age. Many of these dyestuffs that traveled great distances would have yielded brilliant colours more easily, and so they were generally more expensive, reserved for those who had the wealth to spend on such luxury goods.

Madder root, a common vegetative dyestuff used to obtain a variety of reds

Even locally grown plant sources could produce brilliant colours, however, if the dyer was skilled and patient enough to obtain the dyes from the vegetative sources, which could take many weeks to produce. Plant materials used for dyeing wool specifically included madder, woad, weld, lichens, and certain barks, such as walnut, although again, there was regional variation in the accessibility of some dyestuffs. Dyes could also be blended to obtain different colours, and the application of certain mordants (see below) could change the colour that the dyestuffs would yield. Some individuals also chose not to dye their wool garments, and would still achieve whites, browns and greys, dependent on the natural shade of the sheep's fleece.

Woad was one of few vegetative sources that yielded blue dyes
Image: http://www.woad-inc.co.uk/woad-inc_images/woad_layout.jpg
Mordants:
In order to produce more brilliant and long-lasting colours, a mordant would be applied to the wool, either before or after dyeing, depending on the substance being used. A mordant is basically a substance, usually a mineral, that is applied in order to make the colour from the dye more vibrant and help it to stay on the wool evenly. Substantive dyes do not need the application of a mordant to achieve a desired effect, whereas non-substantive or adjective dyes do need the application of a mordant. Common mordants included alum, copper, iron and apparently even stale urine! As mentioned above, certain mordants could be applied to achieve different colours using the same dyestuff (the first video below demonstrates how iron could be used to make a dye produce a greenier colour).

Below I have included a couple videos of a demonstrator briefly discussing vegetative dyestuffs and mineral mordants that could have been obtained in England during the Saxon period, but the materials she displays would also have been common during the Viking Age as well. The swatches she has created and the visual demonstration of dye preparation and mordant sources are useful in understanding the techniques, and since we're talking about colour, we should add a little visuality to the mix! (Forgive the enchanting flute in the videos!)


The wool I have been using for my nalbinding was not hand-dyed, but I can definitely see how fun and rewarding hand-dyeing could be! Textile production wasn't the relaxing past-time it is today, but it might be a fun summer project for me to try (although I think I'll steer clear of the stale urine). I chose grey, dull brown and plum coloured yarns for my practice. It's interesting to think that these colours could very well have been achieved during the Viking Age!


Sources:
DEGANO, I., RIBECHINI, E., MODUGNO, F., and COLOMBINI, M. P., 2009. Analytical methods for the characterization of organic dyes in artworks and in historical textiles. Applied Spectroscopy Reviews, 44, pp. 363-410.

FRANSEN, L., NORGAARD, A., and OSTERGARD, E., 2011. Medieval garments reconstructed: Norse clothing patterns. Hightown, Lancaster, UK: Aarhus University Press.

HALL, A. R., 1996. A survey of palaeobotanical evidence for dyeing and mordanting from British archaeological excavations. Quaternary Science Reviews, 15, pp. 635-640.

TAYLOR, G. W., 1983. Detection and identification of dyes on Anglo-Scandinavian textiles. Studies in Conservation, 28(4), pp. 153-160.

http://www.cs.vassar.edu/~capriest/vikdyes.html
http://vikingladyaine.wordpress.com/2013/01/26/mordants-wool-and-natural-dyes/
http://www.woolery.com/store/pc/Information-on-Natural-Dyes-c567.htm
http://www.hurstwic.org/history/articles/daily_living/text/clothing.htm

As promised...a bone needle!

So the other day we were trying to figure out a cost effective way to obtain some bone or antler for a bone needle for this project.  Apparantly, antler is quite expensive around here, so it was decided to try for some bone instead.  In the spirit of experimental archaeological research, my boyfriend so kindly obtained and consumed a T-bone steak so I could use the bone for the needle.  What a guy!
So after many hours of boiling and scraping and sawing, then boiling and scraping some more, I would up with a workable piece of bone.

It was next to impossible to get that dark marrow out...and I'm extremely impatient sometimes, but I did my best to clean it and saw it down to size.  AND...I have all my fingers still!

 I don't really have good tools for this kind of thing.  I only used a regular saw, the dull pocket knife you see in the pictures and a power drill for the yarn hole....oh and some sandpaper to file it down.
 So, after many hours of cleaning and scraping, followed by an hour or so of sawing, shaping and filing, this is what I came up with.  My thumb was pretty sore and I nicked it a bit with the saw (just a little....barley any blood...).
 It is shorter and broader than my chopstick needle.  I tried it out, and I think I still prefer the wood one.  I think my bone needle is a bit too short to be effective for nalbinding...but hey, at least I tried!

Tuesday, November 12, 2013

Some Cultural Backround

I would like to start off with a basic overview of nalbinding as it is most commonly referred. Firstly it requires only one needle that is used to make non-continuous pieces or threads that are then attached through further loops to create larger pieces. Because the thread is pulled all the way through each loop, it does not unravel, this results in a row by row upward spiral. As a textile technique, nalbinding or the method of single needle knitting is not limited to Scandinavia but stretches as far as Israel, Egypt and Peru. Most often nalbinding is used to make mittens, socks, hats, milk strainers, bags, sweaters or shirts and even dresses depending on your level of ability...like in this picture on pinterest posted by one Alison Fuchs

 https://s-media-cache-ec0.pinimg.com/originals/78/18/51/781851d1aeb881a778b0e5cf696d6ffb.jpg
https://s-media-cache-ec0.pinimg.com/originals/78/18/51/781851d1aeb881a778b0e5cf696d6ffb.jpg

OR this, also by Alison Fuchs, which I totally want ....


https://s-media-cache-ec0.pinimg.com/originals/73/87/93/73879312c5726bf27847a20d61db9816.jpg
https://www.pinterest.com/pin/123286108522988455/

As my research part is for the sociocultural aspects, I will start with what's most easily found in regards to Scandinavian nalbinding. Basically everyone 'knows' that women would have been the predominant group to deal with textiles and its relation but because of poor preservation, it's hard to tell fiction from hopeful fact in regards to the backround of nalbinding.
Now considering the fact that if you type nalbinding into Google today you can find thousands of results that showcase all the possibilities of nalbinding, it would be so easy to find out who did it, why, its importance in culture but then you would be quite mistaken. Even with the mountains of information available, you'd be hard pressed to find material associated with its cultural history.

Especially if you take into account folklore in parts of Scandinavia and the current interpretations of such stories. For example in Finland, that say fishermen and hunters had to have been very proficient in nalbinding because they had to make their own clothing and materials for their hunting or fishing trips. Supposedly because they would lose their good luck in hunting or fishing if they wore clothes nalbound by women, so you could assume that men, probably as boys would have been taught how to nalbind along with girls.

In Finland there is also 'record' of a small municipality, Joutseno, that had the custom of paying the church clerk in either money or with nalbound mittens as payment for a wedding. This would suggest that depending on the level of skill, items made using nalbinding would be considered quite precious. Along with this is the tradition of women, generally the bride, making nalbound mitten elaborately decorated for her husband to be, as well as other important guests of the wedding. The bride was also to arrive newly wed at her in-laws with a set number of proper nalbound clothes to demonstrate her skill in crafts and as a useful member of the family.

In general there is little evidence of nalbound clothes for sale very often in any parts, this I think is mostly due to the personal esteem associated with being able to make nice things for your family and your family only. With exceptions at times of festivals or to honor someone in particular with a well made gift. Now as speculation on my part, I think giving mittens and such as gifts would not only apply to making the items yourself in terms of labor but perhaps to the quality in concerns to the type of wool or fabric used, the level of decoration and perhaps even a cultural representation of what it meant to give someone something in a society of exchange and reciprocity.

Overall, as is often the case in regards to female realms of work, there is little or obscure evidence about women and nalbinding. Most of it is hearsay and speculation based on close culture cousins of the Scandinavians but with little supporting archaeological evidence as of yet. Or else it's not easily (if at all) found accessible in english, needless to say Google translate has recently become a dear friend... so on that note I shall get back to it.

Most of the information in this post has been found at http://www.en.neulakintaat.fi/17#Lahempana, with some further research of the sources used by her at the bottom of the page.

Yarn Spinning

It’s easy for us to take for granted where our yarn comes from and how it was produced. For the casual knitter like myself, all that needs to be done to start a project is a quick search on Ravelry or through a book for a pattern. To acquire the appropriate yarn for the project, one can travel to a favourite local woolshop and select from a large inventory of ready-made yarns of various makes, materials and qualities. Knitting is a fun and relaxing past-time nowadays, and yarn production is left to the manufacturing companies and those who choose to produce their own yarn out of interest.

During the Viking Age, textile production was not a relaxing hobby. Yarn spinning, as well as weaving and nalbinding, were important household tasks that consumed a great amount of time each day. In order to produce clothing, bedding and other textiles for trade and to keep members of the family warm in the cool northern climate, immense quantities of wool needed to be spun into lengths of workable yarn, making spinning a top priority. During this time period, yarn production was completed entirely by hand. Today, re-enactors and hobbyists still hand spin their wool using the drop-spinning method that was employed during the Viking Age, but out of interest rather than necessity. This blog post will outline the technique of drop spinning that was used during the Viking Age to produce wool yarns.

Viking Age replica spindle whorl
Although flax and other related plant fibres were most likely also utilized, wool was the most common source of yarn during the Viking Age. There were many factors that contributed to the quality of yarn produced from wool, such as the breed of sheep from which the wool was shorn, and the section of the sheep’s fleece from which the wool came from; for example, the outer coat of the fleece which yields the longest hairs is the most coarse, whereas the inner short fibres of the fleece are much softer. 

There are many different breeds of sheep today, and the specific breed raised during the Viking Age largely depended on the area of habitation.
Image: http://www.wallpaperswala.com/wp-content/gallery/sheep/cute-lamb-wallpaper.jpg
Once the wool had been shorn from the sheep, it could be cleaned, depending on preference, all the foreign matter removed from the wool and possibly soaked in water. After cleansing, the fibres would be untangled and organized using a pair of hand combs (carders were a later invention). After combing the wool, the fibres would be hand spun into yarn using spindle whorls of stone, bone or ceramic, with shafts made of wood, or possibly bone. The method of hand spinning that was used was called “drop spinning.”

A basic tutorial on drop spinning.


This video shows the basic technique of drop spinning. The fibres were pulled down and spun together by the weight of the whorl. One could achieve different sizes of yarn based on the weight of the whorl; lighter whorls were generally used to make thinner threads, whereas heavier ones could produce thicker yarns. According to Spindle and Wheel, a blog devoted to yarn crafts from which a lot of this information was sourced, the average whorls that have been recovered were about 10 to 14 grams, although smaller whorls are also quite common. After spinning, the yarn would be wound onto a reel, and could then be used for nalbinding or weaving. In order to produce adequate amounts of material to produce textiles for the entire family or for trade, spinning was a constant activity that required great attention and expertise.

Although we are purchasing all our yarns ready-made for our nalbinding project, it would be really interesting to try hand spinning wool using the drop spin method that has been described above. There are loads of re-enactor websites and YouTube videos devoted to making your own spindle whorl and learning the technique. Perhaps this is beyond the scope of our project, but I’ll definitely need to try drop spinning myself in the future!


Sources:

FRANSEN, L., NORGAARD, A., and OSTERGARD, E., 2011. Medieval garments reconstructed: Norse clothing patterns. Hightown, Lancaster, UK: Aarhus University Press.

LARSSON, A., 2008. Viking Age Textiles. In: S. BRINK, ed, The Viking World. London and New York: Routledge, pp. 182-185.

Monday, November 11, 2013

Experimenting with making needles and recent improvements

So I finally got around to trying to make my own needle.  Inspired by Anna's chopstick needle (see video), I too grabbed a chopstick and started carving.
In the middle is my chopstick needle.  For comparison, to the left of it is my tapestry needle.

My first try with my new needle.  It works WAY better than the tapestry needle.  It is thinner than what an actual nalbinding needle should be, but the flatness of it makes the stitches easier to produce.

My first round!!!  I'm happy with the way this turned out.

Another round.

Nalbinding is very unforgiving.  I pulled the wrong sting on this piece and ended up knotting the end to the point where I couldn't pull it out.  I had to start again.

This is a large round piece I have been working on.  I am hoping it will turn out something like a head warmer (headband style...).  Sadly, it is twisted, but I am still going to keep working on it, maybe I can salvage it somehow.  This took me about 3 hours to make, showing how time consuming nalbinding can be...especially for beginners!
Currently, I am boiling some beef bone so I can attempt a bone needle.  I have cut it to size and now and trying to get the marrow out.  Pictures and results to come tomorrow....wish me luck!


Saturday, November 9, 2013

Our How-to Nalbind video


Alright everyone here it is, our very own Nalbinding how to video!
We shot the video when we met on Sunday, Nov 3rd using Nicole's iphone. I should have realized that would format the video in MOV which meant before I could edit it I had to convert it to MP4.
I didn't do anything super complicated, partly to limit the length although it still ended up over the limit for posting directly to the blog (only 100MB, about 5mins). Initially I tried to compress it but even then it was 173MB, and any further compression would ruin the quality, as such I made a youtube page for our group to be able to link it to here.  
Enjoy, and I welcome any feedback or adjustments if someone feels somethings missing :)

http://youtu.be/bzYQzOLYRbs


Archaeological finds!

As part of our research into nalbinding, I wanted to find out what kinds of artifacts have been found in the archaeological record.  Turns out, the information is sparse.....very sparse!  I guess this should be expected as the natural wool fibres are susceptible to decay over hundreds of years of being buried under the ground.  That being said, I have found some information on two archaeological finds: a sock found in Jorvik (York) and a mitten found in Åsle, Sweden.


The Coppergate Sock


This sock was found as part of the Coppergate excavation in York, England.  It was associated with a 10th century post and waddle house, and so far is the only example of nalbinding found in England (perhaps off the foot of a traveller???).  Analysis of the sock suggests that using a bone needle, the maker started at the toe and worked their way out from there.  There is also evidence to suggest that it had been patched or repaired in some way.  It has not been determined what colour it may have been, but it is believed that it had a red band around the ankle area.
Sources: http://jorvik-viking-centre.co.uk/about-jorvik/gallery/
Wild, John P., 1988. Textiles in Archaeology. Aylesbury, UK: Shire Publications

The Åsle Mitten


As are so many finds from this period, this mitten was found in a stray context on a farm in Sweden.  In  1913, a farmer was digging up some peat and came across this piece, unfortunately, damaging it with his spade in the process (see just above and to the right of the thumb).  The stitch used on this mitten is a bit different than the traditional Oslo stitch, and as such was deemed the Åsle stitch, in honour of where it was found.  It is believed to be from the 16th or 17th century and is currently housed at the Åsle Tå museum in Sweden.
Source: http://www.asleta.se/en/kategori/19/asle-mitten.html

4th or 5th Century socks from Egypt

Nalbinding is actually thought to have originated in the Middle East or North Africa, with the earliest finds using our technique dating back to 6500BC!!!  These socks were found in Egypt and date to around the 4th or 5th century.  These socks were likely meant to be worn with sandals, as indicated by their split toe, something I haven't come across when searching the Scandinavian artefacts.


Thursday, November 7, 2013

Hat and Quotes

I'm starting to get accomplished enough at nalbinding to try to create finished products. I couldn't really find any patterns and I didn't even count my stiches. I just winged it. My first try was a hat, originally supposed to look like a toque. It started very well.


However, after doing a few rounds I realized that the band didn't fit around my head anymore! Apparently the stitches do not stretch as much as knitting stitches. Since I can't pull out my stiches I returned to the bottom of the work and tried to increase the size. This didn't quite work. I thought for a little while about cutting into some of the middle rows and somehow or another adding stitches but this seemed like it would turn out as a disaster so I abandoned the idea. In the end it looked like a small sun hat.
Actually, it looks like a very messy hat because of the places where I had to join the yarn. To make the hat go quickly I simple wrapped a new pieces of yarn around my finger and continued around but it made lots and lots of loose ends which I had to weave in or cut off and it made holes in my work. This was no good! I ended up watching the same video as Amina on Russian and felted joins. For me, the Russian join worked the best and the felting did nothing. When Amina and I talked about it at our last meeting she said it was the opposite for her. I wonder if it has to do with the type of yarn that we have (mine says it can be washed) or whether it is just personal preference.
 
Next up: a mitten with Russian joins. Hopefully it will be done in time to present.
 
I also grabbed some quotes out of a book on Viking women but there was not a lot of information concerning textiles. This is all I got from the entire book.
 
Jesch, J., 1991. Women in the Viking Age. Sussex: Boydell Press.
pg. 19. "Most common implements found in [female] graves are those used in the making of textiles: wool combs, spindle whorls, loom weights, weaving battens, weaving tablets, needles and various implements that could be used in a variety of working contexts: knives and shears, whetstones for sharpening them, and containers of various types and materials."
 
"Although it is true that many of these objects, particularly the textile working implements are characteristic of women's graves, none of them are exclusive to female burials."
 
Pg. 40. "... most people, in fact, still lived a rural life based on farming" (vs. trading ports)
 
pg. 41. "Women living in rural areas in the Viking Age spent most of their time in the triangle of byre, dairy and living quarters, providing their families with food and clothing."


Tuesday, November 5, 2013


This is  still shot from our upcoming instructional video.....stay tuned!

Sunday, November 3, 2013

Getting Better!

For my portion of the project, I'm focusing on the practical aspects of nalbinding (for example, how the materials and techniques of nalbinding compare to modern knitting). Rather than making a piece of clothing, right now I am creating swatches of nalbinding in order to learn the technique and to experiment with things like cleaning and felting. In this post, I will describe some of the challenges I have faced in learning nalbinding, as well as how my background knitting knowledge has helped, and hindered, my progress. This is the video I have been primarily using to learn the Oslo stitch. Although it is in two languages, I find the clarity of the video and the pace at which she works is very helpful in my learning.

Singles vs. Multiplied Yarn:
Initially, I was using acrylic multiplied yarn in order to simply learn the technique, so I could save my single plied wool for when I had gotten better. However, using multiplied yarn (which was not present in the Viking age) was really challenging! It was really easy for me to split my yarn with my needle by piercing right through the different strings that make up the multiplied yarn. When I decided to switch to the single plied yarn, it was much easier to make out the different loops and stitches.
Acrylic multiplied yarn; a no-no

Needles:
I also had some troubles with the modern tapestry needle I was using. Unlike traditional nalbinding needles, which are blunted, long and made of bone or wood, my tapestry needle is made of metal and rather short and the end, although blunted, can still pierce through yarn because of the size of the point. Anna creatively fashioned some nalbinding needles out of chopsticks, and when I tried using one of those the technique was much easier. The larger sized needle was easier to hold and manipulate, and because it was made out of wood rather than metal, the yarn stayed in the eye of the needle because of the friction created by the surface of the wood. (I have a similar issue when using metal knitting needles; I find it far easier to keep the stitches on a bamboo knitting needle compared to a metal one.)

Metal tapestry needle


Yarn Length and Connecting Your Pieces:
With nalbinding, small pieces of wool are used, no longer than your arm span. When the piece of wool becomes to short to use, you attach it to the next length of yarn. If the yarn piece you are using is too long, it will tangle really easily, but if it's too short, you have to connect your pieces more often, and the material you produce will not be as strong. It's a delicate balance! When I knit, like most people who do, I use a ball of yarn and only have to connect a new ball a couple times, if at all, depending on the project. But using a ball of yarn is out of the question in the case of nalbinding. I suppose this is an advantage if you want to use up scraps of yarn, but when I knit, I avoid connecting different balls like the dickens, so this was a challenging aspect of nalbinding for me. I experimented with a couple different ways of connecting yarn, but I found one of the best ways, in terms of ease and quality, was to felt the ends together, or "spit splice," by rubbing the ends together with your dampened hands, which, because we are only using wool here, felts the yarns together. I would say having to do this so often is an inconvenience for me, and was probably one of the greatest challenges for me in learning the nalbinding technique.

This is the video I used to learn how to felt join yarn pieces. While the maker does not state that this is a "Viking" technique, I would assume that because individuals nalbinding during this period were using primarily wool and were felting their materials, some would have used this method.

Consistency in Tension and Stitch Size:
When I knit, my stitches come out the same size consistently because I am placing them onto a knitting needle, which has a consistent circumference along the shaft. With nalbinding, however, you tighten your loops around your thumb in order to measure out equal stitches. Because I am really new at this technique, I find it very challenging in keeping the stitches the same size, and my thumb, rather than being a long even rod, is bumpy and irregular. I'm sure with more practice, and with getting used to placing the loops on consistent points of my thumb, I can learn to make my stitch sizes more consistent.

Ripping Out Stitches:
Nalbinding is essentially tying lots of knots together to form a larger piece, but if one of the knots turns out wrong, it it very challenging to undo the work. With knitting, you are just creating loops that you can pull apart if you miss a stitch. But with nalbinding, you cannot just rip out the stitches you have made; you have to untie the knots. This is both a blessing and a curse. On the one hand, it means that fixing your errors can be incredibly frustrating, because you're picking apart lots of little knots. On the other, this also means that your work will not undo itself when you don't want it to. If your knitting slips off your needle, it can unravel and you will have to do your work over again, but this problem does not exist in nalbinding.

But progress is being made!
The first picture below with the white yarn is one of my first (failed) attempts at nalbinding, and the second with the grey yarn is one of my most recent. I'd say I'm definitely improving! As with anything, nalbinding is a skill that requires patience and practice, and I think mine is paying off!